Showing posts with label retro-modern. Show all posts

Monday, April 16, 2012

A little lonely

It's starting to feel a little lonely around the Nickarmadillo homestead.

The girlfriend returned home to England last Saturday and our little foster puppy, Henry, went to his new family.  He's a great dog (potty and crate trained at 6 weeks old!) and I'm sure that they'll get along famously.  He even gets to live with one of his litter-mates, which is a big plus!  Puppies always do better with a companion.


Despite the positive news, it's always hard to see them go.  You get really attached, even after just a few weeks or days.

So, here I am, all alone in this old house.  I do have a lot of new retro goodies to keep me company though.

We'll get to those in a bit.  First, lets tie up a few loose ends. 

When I posted about the estate sale where I found the West German Pottery and the brass candelabra, I totally forgot two of the coolest things that I found at the sale.

This fiberglass lampshade really spruced up that lamp (a retro Quartite lamp found at the local Goodwill) in the living room.  As you might remember, I'd paired it with a tacky, ribbed 1980's shade that certainly wasn't  doing it any favors.  Now it's retro-stylin' thanks to Mr. Modtomic's ladyfriend, who set it aside for me after the estate sale employees decided to make me move my car as they opened the doors (Thanks again!).


 I also picked up this Paymaster check protector.  Check protector?  Office equipment?  Sounds pretty boring.


Actually, these things are a hot ticket right now.  Collectors have been hoarding them all, so they're somewhat hard to come by.  We still use them at the office, so I make sure to keep an eye out for them at the thrifts.  


 I really like that red "fish scale" pattern.  Very Mid-Century Modern.
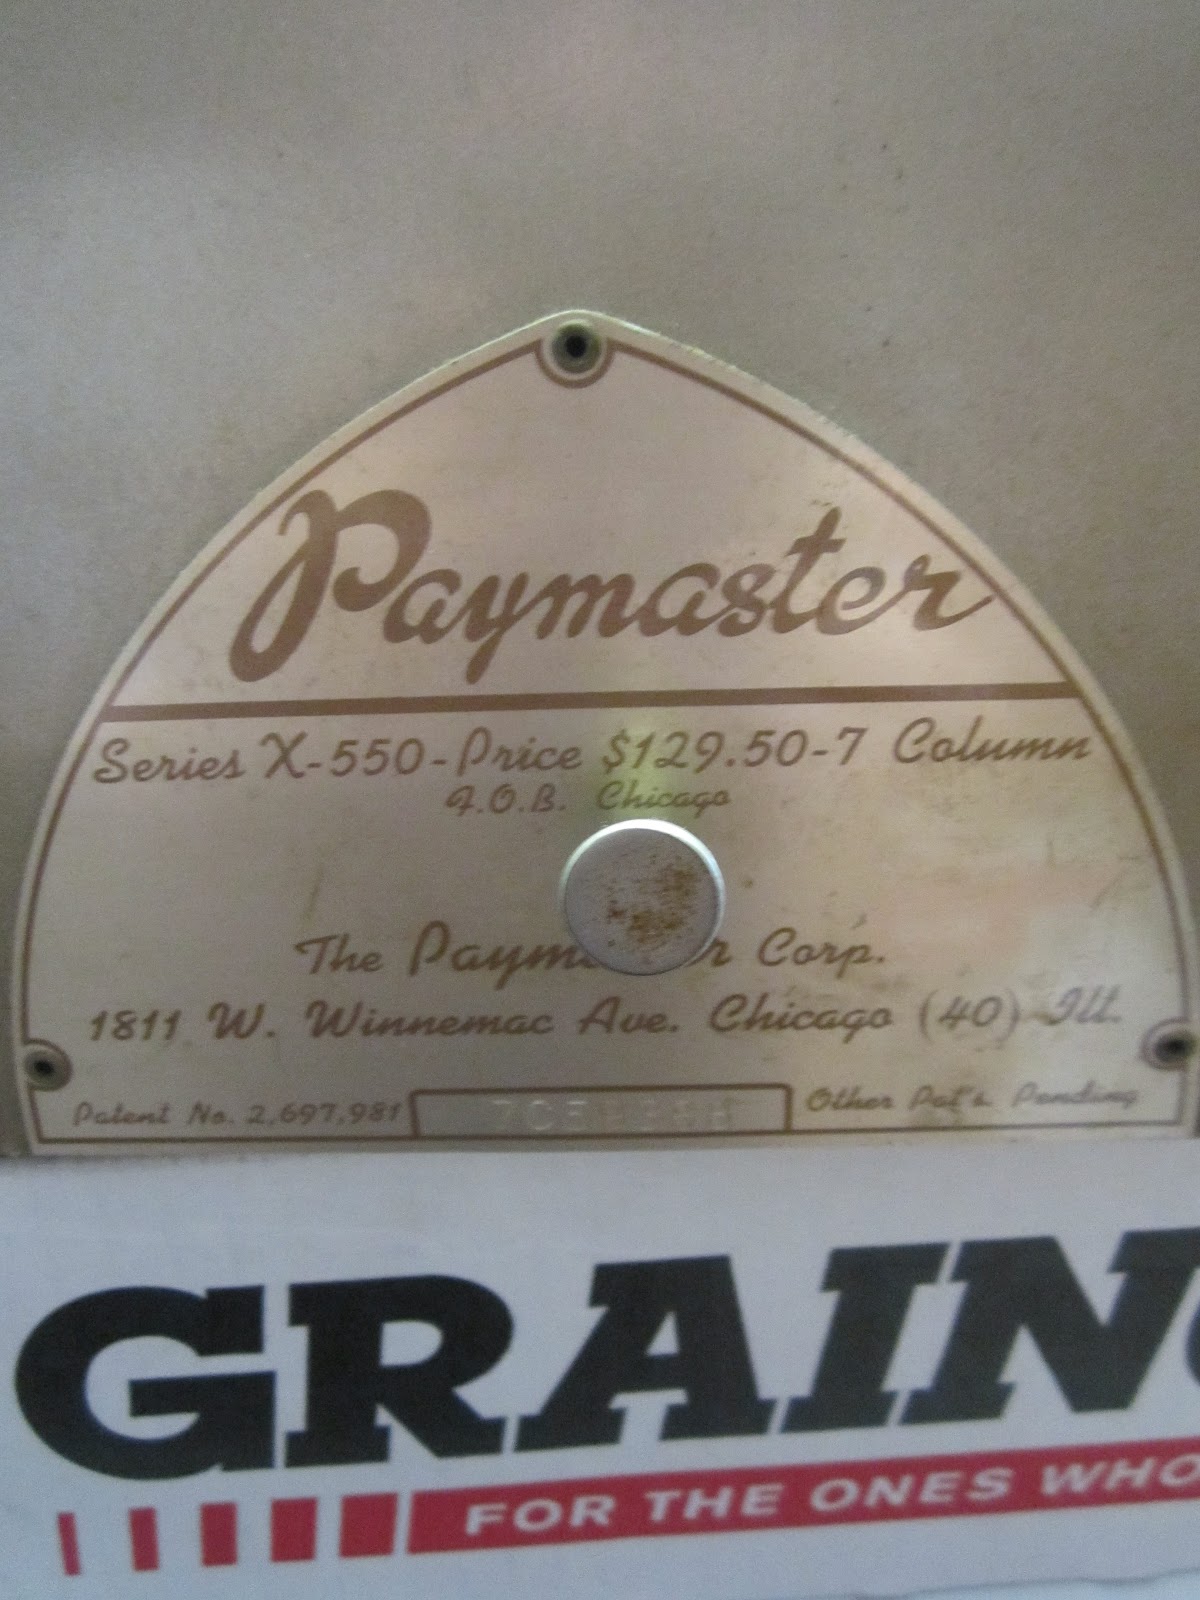

I find it odd that they engraved the price on this one.  Isn't that a little permanent?  Wouldn't it have been easier for them just to put a price sticker on the box or to let the retailer price it?  And, my-oh-my, look at that price.  That's equivalent to over $1100 dollars today!  


It needs a little ink, but still works like new.  Thank goodness we aren't still paying retail for them.

That's all for now, folks.  See you in a few.


Tuesday, April 3, 2012

Estate sale scores

Sorry for the delay there.  The girlfriend just arrived back in town and we've been dealing with a few more house issues. 

So here's all the goodies that I picked up at the estate sale 2 weekends ago with Mr. Modtomic.  They had a decent selection of MCM stuff, but prices were a bit too high for my liking.  The estate sale companies seem to be catching on to the whole retro-modern trend and adjusting their prices accordingly (some more so than others).  There's also pretty stiff competition from dealers.  Mr. Mod, his girlfriend, my friend Jon, and I showed up pretty darn early but our team was 4-7th in line.

I was really lucky to get anything at all, because the organizers made me move my car AS THEY OPENED THE SALE!  Oh c'mon.  I'd been waiting there all morning.  Why make me move it now?  Couldn't it wait 2 minutes?

I guess the real competition was over the American of Martinsville dining set, because I was like 25th into the place and all of these smalls were still sitting with their tags in the corner.  Sweet!


I'd actually lost out on an Ebay auction for one of these brass candelabras a few months ago.  I was a couple minutes from winning for a few dollars and the seller took it down to "correct the international shipping rates" and then relisted it with a $50 reserve price.  Well, who needs him/her!  Now I've snagged my very own for a small fraction of that reserve.


I'd also been looking all over for some West German pottery.  This green and orange piece, with its texture and bright colors, is my personal favorite.  It almost looks like a Brutalist sculpture.


These mugs were kinda an impulse purchase, but at 50 cents, who really cares?  Now I can sip in style.

Overall, things turned out better than expected after the car fiasco.  I've spent most of my time/money going after large pieces of furniture and haven't really focused on smalls, so this will really help to fill the place out.

See you all in another couple days.  Good luck and good thrifting!


Friday, March 2, 2012

Mid-Century DIY: Retro Planter

Are you sick of boring, generic plant pots from big box stores?  Tired of trolling Craigslist for mid-century planters and coming up empty-handed?  How about paying over $150 for a reproduction bullet planter?

Finding retro-modern planters can be an arduous and expensive task...

... but no longer!

Today I'm going to show you how to whip one up in a matter of an afternoon and at a cost of about $16.


Materials:
Bel Air Bamboo Planter (Lowes - Item #293923)
Ruler
Pencil
Drill
Drill Bits (1/16" and 15/64")
3x Waddell 3" Furniture Legs (Ace Hardware - Item #60536349613)
Fine Sand Paper
Danish Oil
Rag
Wood Glue

Step 1: Prep
I've chosen this particular Lowe's planter due to it's modern shape/color and bamboo construction, which should make it fairly easy to drill and work with.  Start by removing any stickers and remaining adhesive.  


Then you will need to draw drill guides onto the underside of the planter using your ruler and pencil.  I planned to attach 3 legs, and so divided the circumference of the bottom (circumference = 3.14 * diameter - Didn't know you'd be getting a math lesson here, did you?) into thirds.  Make these marks at least 1" (the radius of the leg) from the edge of the planter.


Step 2: Drilling
Now you're ready to drill baby, drill!  Using a power drill make small guide holes (I used a 1/16" bit) at the points you've marked.  Given the coiled-bamboo construction of this planter, starting off with a larger bit might result in damage, so don't get hasty and skip this step.  


Once you've made the initial guides, go back and drill out the holes with a bit slightly smaller than the bolt on the legs (I used a 15/64" bit) and clean up the piles of sawdust you've gotten everywhere.


Step 3: Preparing the Legs
Now it's time to get those legs prepped.  Start off by giving them a good sanding, but make sure not to scratch the brass ferrules.  I ended up only using a fine grade, as I'm not too picky about this sort of thing.  If you are looking for a smoother finish, start of with fine and then move on to successively smaller grit sizes until you get them to your satisfaction.


Then clean 'em up, grab a rag, and rub on a coat of Danish Oil (or your finish of choice).  Give the oil 15 minutes to soak in between coats (2 should do it) and let them dry for at least a couple hours.  


Those are some sexy legs, eh?  These things bring all kinds of possibilities to mind.


Step 4: Attaching the Legs
You're almost there!  I'd prefer to use glue in conjunction with a nut and washer to hold this thing together, but the bolt isn't long enough to fit the extra hardware so glue alone will have to do.  Dab a small amount of wood glue around the bolt on each leg, making sure to get it into the threads for extra stability.  Remember, I said a SMALL amount of glue.  We don't want a big sticky mess here.


Next, just screw the legs in and wipe up the excess (because you used too much, didn't you?  I did.).


Another little dab on the inside of the pot where the bolt penetrated should keep everything water-tight.


Step 5: Enjoy
Wait 8 hours for the adhesive to dry and BOOM, you've got yourself a swank retro-modern planter!


If you feel like changing it up, these planters come in a variety of sizes and colors, as do the legs.  I'd recommend 4 legs if you plan on using it for something tall or top-weighted, but 3 should be stable enough for most applications.


So, what'd you think?  It's not a bullet planter or architectural pottery, but pretty cool, no?  I'm considering putting together an arrangement of three in different colors and with different leg lengths to go next to the fireplace.  

Oops, I almost forgot step six...

Step 6: Gimme Some Blog Love
Head on over here, sign in (you can sign in through Facebook or other services if you don't want to make an account), and hit the "vote" button next to Mid-Century Midwest ;)

Sunday, February 19, 2012

The Hunt

At this point, I think that my search for a living room rug could take up its own blog.  Yet, I haven't found the perfect specimen.  Any of these tickle your fancy?  Overstock is running a 15% off sale on area rugs that ends at midnight, so hopefully I can figure something out.  Considering how indecisive I've been about this whole rug ordeal, I wouldn't count on it.

My living room

The contenders:
(reviewers assure that the colors are more muted in person)


Thursday, February 9, 2012

We have liftoff!

While I didn't check everything off of my to-do list last weekend, I did complete one long overdue project.


Yes, the sputnik has come out of hiding and taken its rightful place in the dining room.

I <3 this chandelier!  I mean I REALLY LOVE it.  If marriage to inanimate objects was legal in the state of Missouri, I'd be writing my vows right now.  Unfortunately, society frowns upon our affections and this dream will never be realized.

In all seriousness though, I couldn't believe my luck when I found it at an estate sale last summer for a song.  It's a big'n too - a full 24 inches of brassy, atomic goodness.


I'd planned on putting it up just about every weekend for the last few months, but kept delaying because I thought that there might be some way to fix those tarnish/scratch issues.  Brasso, Katsup, and a mixture of vinegar and salt - all tried to no avail.  I was even thinking that I might just get it re-plated.

Perhaps I also had a feeling that it'd be a nightmare to hang.  It was.  Don't ever attempt to tackle a sputnik installation on your own unless you enjoy contorting yourself into all sorts of awkward positions and being poked in the face with brass rods.

Eventually I just couldn't bear it sitting in the storage room any longer.  So there it is, blemishes and all.

As you can plainly see, the chandelier is missing a few bulbs, but that's another project for another day.  Apparently 15 watt chandelier bulbs are extraordinarily hard to find and I'm not paying $3.87 per set of 4 ($23.22 just for the dang bulbs!) at Home Depot when they can be found for $.97 online.

It does take 15 watt bulbs, right?  None of them have any markings, so I'm not completely sure.


It used to have a full set of star bulbs, but they were taken out by an overzealous estate-saler who tried to snatch my prize AFTER I'd paid for it and set it aside at the checkout counter.

Now, I want you to close your eyes and picture a cheap, generic, builder-quality chandelier.

Does it look like this?


I'm so glad to see that light fixture go.  The whole contemporary brushed steel combined with very traditional marbleized frosted glass thing should've died in the 90's.  OK, so maybe that's a bit harsh, but I'm still bitter about being sliced open by its cheap stamped metal edges and the fact that it began rusting after hanging for only 6 months.


Ahhhhhhh, much better.

Saturday, February 4, 2012

Another Craigslist find


 Well, look what I drug home on this dreary Saturday morning.


A little late-night browse on Craigslist turned up a listing for an "Mission retro table."  However, as any MCM fan would recognize, it isn't Arts & Crafts at all.  It's a Herman Miller by George Nelson Platform Bench, or at least a fairly decent replica.


The Herman Miller website has the following to say:

"Introduced in 1946, the Nelson platform bench remains a landmark of modern design. The clean, rectilinear lines reflect designer George Nelson's architectural background and his insistence on what he called "honest" design—making an honest visual statement about an object's purpose. The bench serves as a multipurpose display and resting place in offices, public areas, and homes."

Personally, I prefer the natural wood finished tops, but for the price I can't really complain.  In the end, I offered double the listing price, because the seller already had a buyer lined up and I wanted to get the first crack at it.  Still, 2 x practically 0 = not much at all.

Even with the double offer, I thought that I'd lost out at one point.  When I showed up, the seller mentioned that someone had called and offered her $200(!) for the bench.  Obviously someone out there either REALLY loves George Nelson or has cash to burn.  Turns out, she refused because she thought that it sounded suspicious that someone would give her so much for a bench.  I'm not sure if I would have been able to resist an offer like that. What's a little kidnapping/serial killing if you can bring in that kind of dough?

I didn't notice any tag or mark, so I thought that it might just be a replica, but the more I look at it, the more I think that it might be an actual Herman Miller.  The angles, shape, and dimensions (14 x 18 1/2 x 48) are certainly correct.

The construction is what really has me convinced.  The originals used dowel rods to connect the slats along the ends...


source: Design Addict

... a doll rod at each side and a row of nails in the middle...


and phillips head screws to connect the base


Generally speaking, The best way to tell a replica apart from the real deal is to take a look at how it is is put together.  Most replica-makers used inferior materials and methods, taking short-cuts or deviating from the original in some manner in order to lower production time/costs.  For example, they might use screws instead of doll rods in a piece such as this.

I cant be 100% sure though.  I'm pretty fresh to this MCM stuff and I'm certainly no expert.

Overall, the condition is fair.  I'm not sure what the correct carpentry term is here, but one of the crenelations along the side had chipped and cracked a little.  Other than that, there's just the usual scuffs, scratches, and dirt.  I was thinking about giving it a fresh coat of paint or perhaps stripping the top and putting a natural finish on it, but since this might be an original, I think I'll leave it alone for the time being.  


While I was in the living room, I also took the time to rearrange the Plycraft lounge chairs.  The chartreuse one has a few scuffs on the back and I really wanted to show off that replica Eames Lounge's sexy rump, so this works much better.